Easy way to create a Filament Theme in minutes!
- Oct 21, 2022
- Leandro C. Ferreira
- Tailwind CSS, Admin panel
Introduction
Filament allows you to change the fonts and color scheme used in the UI, by compiling a custom stylesheet to replace the default one. This custom stylesheet is called a "theme".
Themes use Tailwind CSS, the Tailwind Forms plugin, and the Tailwind Typography plugin, Autoprefixer, and Tippy.js.
Installation
To get started with the Filament, you can install a new Laravel project called filament-custom-theme:
laravel new filament-custom-themeNow you can install Filament using the command:
cd filament-custom-themecomposer require filament/filament:"^2.0"Filament recommends adding this to your composer.json's post-update-cmd:
"post-update-cmd": [ // ... "@php artisan filament:upgrade"]Configuration
You may publish the configuration of the package using:
php artisan vendor:publish --tag=filament-configUpdate the Filament config file to change some attributes:
//config\filament.php'dark_mode' => true,'google_fonts' => 'https://fonts.googleapis.com/css2?family=Rubik:ital,wght@0,300;0,400;0,500;0,600;0,700;0,800;0,900;1,300;1,400;1,500;1,600;1,700;1,800;1,900&display=swap',Edit the User Migration File:
Schema::create('users', function (Blueprint $table) { $table->id(); $table->string('first_name'); $table->string('last_name'); $table->string('email')->unique(); $table->string('phone_number')->nullable(); $table->boolean('active')->default(0); $table->boolean('is_admin')->default(0); $table->timestamp('email_verified_at')->nullable(); $table->string('password'); $table->rememberToken(); $table->timestamps();});You can add the new columns to your User Model:
//app\Models\User.phpprotected $fillable = [ 'first_name', 'last_name', 'email', 'phone_number', 'active', 'is_admin', 'password'];By default, Filament will use the name attribute of the user to display their name in the admin panel. You need to create the Name Attribute:
//app\Models\User.phpuse Illuminate\Database\Eloquent\Casts\Attribute; protected function name(): Attribute{ return Attribute::make( get: fn () => $this->first_name . ' ' . $this->last_name, );}Edit the User Factory definition method:
//database\factories\UserFactory.phppublic function definition(){ return [ 'first_name' => fake()->firstName(), 'last_name' => fake()->lastName(), 'email' => fake()->unique()->safeEmail(), 'phone_number' => fake()->phoneNumber(), 'active' => fake()->boolean(), 'is_admin' => fake()->boolean(), 'email_verified_at' => now(), 'password' => '$2y$10$92IXUNpkjO0rOQ5byMi.Ye4oKoEa3Ro9llC/.og/at2.uheWG/igi', // password 'remember_token' => Str::random(10), ];}Edit the DatabaseSeeder run method:
//database\seeders\DatabaseSeeder.phppublic function run(){ \App\Models\User::factory(50)->create();}Run the migrate command:
php artisan migrate --seedUser Resource
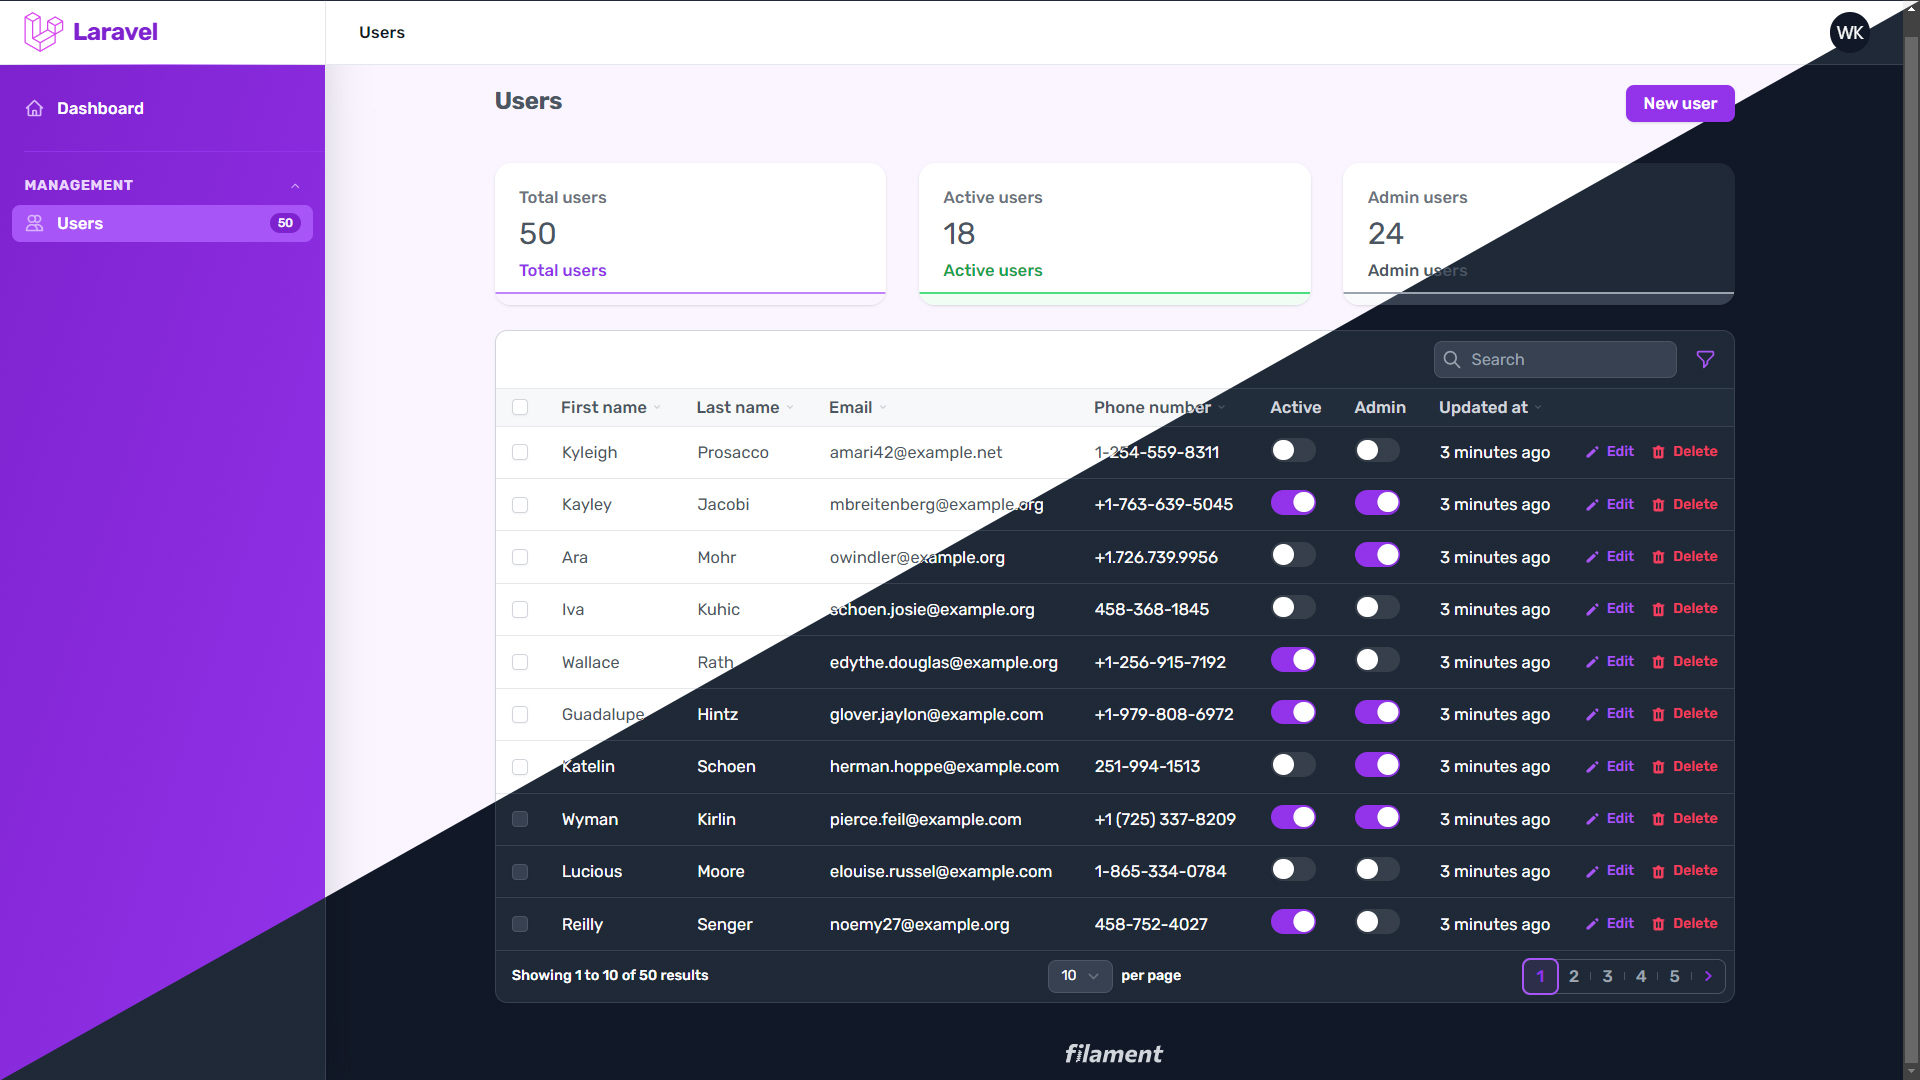
You can create an User Resource and a Widget:
php artisan make:filament-resource User --simplephp artisan make:filament-widget UserOverview --resource=UserResourceYou can add the widget to the ManageUsers file:
//app\Filament\Resources\UserResource\Pages\ManageUsers.phpuse App\Filament\Resources\UserResource\Widgets\UserOverview;protected function getHeaderWidgets(): array{ return [ UserOverview::class, ];}Copy this content UserResource.php and paste it in app\Filament\Resources\UserResource.php
Copy this content UserOverview.php and paste it in app\Filament\Resources\UserResource\Widgets\UserOverview.php
Building themes
You may run the following commands in your terminal:
npm install tailwindcss @tailwindcss/forms @tailwindcss/typography autoprefixer tippy.js --save-devnpx tailwindcss initConfigure the Tailwind Resource:
//tailwind.config.jsconst colors = require("tailwindcss/colors"); module.exports = { content: ["./resources/**/*.blade.php", "./vendor/filament/**/*.blade.php"], darkMode: "class", theme: { extend: { colors: { danger: colors.rose, primary: colors.purple, success: colors.green, warning: colors.yellow, }, }, }, plugins: [ require("@tailwindcss/forms"), require("@tailwindcss/typography"), ],};Configure the postCss in the postcss.config.js to use tailwindcss and autoprefixer:
//postcss.config.jsmodule.exports = { plugins: { tailwindcss: {}, autoprefixer: {}, },}CSS
Edit the app.css file:
/*resources\css\app.css*/@import "../../vendor/filament/filament/resources/css/app.css"; * { font-family: "Rubik", sans-serif; font-size: 1.02rem;} .filament-sidebar-nav { @apply bg-primary-800 bg-gradient-to-tl from-primary-600 to-primary-700 dark:bg-gray-800 dark:border-gray-700 dark:from-gray-800 dark:to-gray-800;} .filament-sidebar-nav .border-t { @apply border-primary-600;} .filament-sidebar-item { @apply text-white;} .filament-sidebar-item .inline-flex { @apply text-primary-50 bg-primary-700 dark:bg-gray-900 dark:text-white;} .filament-sidebar-group svg { @apply text-primary-300;} .tracking-wider { @apply text-sm text-primary-200;} .filament-brand { @apply text-primary-700;} .filament-main { @apply bg-primary-50 dark:bg-gray-900 dark:border-gray-700;} .filament-main-content { @apply text-gray-600 dark:text-gray-400;}You may register the theme file in a service provider's boot() method now:
//app\Providers\AppServiceProvider.phpuse Filament\Facades\Filament;use Illuminate\Foundation\Vite; public function boot(){ Filament::serving(function () { // Using Vite Filament::registerTheme( app(Vite::class)('resources/css/app.css'), ); });}Changing the brand logo
You may create a resources/views/vendor/filament/components/brand.blade.php file to provide a custom logo:
<div class="flex justify-start"> <div> <svg height="40" viewBox="0 -.11376601 49.74245785 51.31690859" width="40" xmlns="http://www.w3.org/2000/svg"> <path d="m49.626 11.564a.809.809 0 0 1 .028.209v10.972a.8.8 0 0 1 -.402.694l-9.209 5.302v10.509c0 .286-.152.55-.4.694l-19.223 11.066c-.044.025-.092.041-.14.058-.018.006-.035.017-.054.022a.805.805 0 0 1 -.41 0c-.022-.006-.042-.018-.063-.026-.044-.016-.09-.03-.132-.054l-19.219-11.066a.801.801 0 0 1 -.402-.694v-32.916c0-.072.01-.142.028-.21.006-.023.02-.044.028-.067.015-.042.029-.085.051-.124.015-.026.037-.047.055-.071.023-.032.044-.065.071-.093.023-.023.053-.04.079-.06.029-.024.055-.05.088-.069h.001l9.61-5.533a.802.802 0 0 1 .8 0l9.61 5.533h.002c.032.02.059.045.088.068.026.02.055.038.078.06.028.029.048.062.072.094.017.024.04.045.054.071.023.04.036.082.052.124.008.023.022.044.028.068a.809.809 0 0 1 .028.209v20.559l8.008-4.611v-10.51c0-.07.01-.141.028-.208.007-.024.02-.045.028-.068.016-.042.03-.085.052-.124.015-.026.037-.047.054-.071.024-.032.044-.065.072-.093.023-.023.052-.04.078-.06.03-.024.056-.05.088-.069h.001l9.611-5.533a.801.801 0 0 1 .8 0l9.61 5.533c.034.02.06.045.09.068.025.02.054.038.077.06.028.029.048.062.072.094.018.024.04.045.054.071.023.039.036.082.052.124.009.023.022.044.028.068zm-1.574 10.718v-9.124l-3.363 1.936-4.646 2.675v9.124l8.01-4.611zm-9.61 16.505v-9.13l-4.57 2.61-13.05 7.448v9.216zm-36.84-31.068v31.068l17.618 10.143v-9.214l-9.204-5.209-.003-.002-.004-.002c-.031-.018-.057-.044-.086-.066-.025-.02-.054-.036-.076-.058l-.002-.003c-.026-.025-.044-.056-.066-.084-.02-.027-.044-.05-.06-.078l-.001-.003c-.018-.03-.029-.066-.042-.1-.013-.03-.03-.058-.038-.09v-.001c-.01-.038-.012-.078-.016-.117-.004-.03-.012-.06-.012-.09v-21.483l-4.645-2.676-3.363-1.934zm8.81-5.994-8.007 4.609 8.005 4.609 8.006-4.61-8.006-4.608zm4.164 28.764 4.645-2.674v-20.096l-3.363 1.936-4.646 2.675v20.096zm24.667-23.325-8.006 4.609 8.006 4.609 8.005-4.61zm-.801 10.605-4.646-2.675-3.363-1.936v9.124l4.645 2.674 3.364 1.937zm-18.422 20.561 11.743-6.704 5.87-3.35-8-4.606-9.211 5.303-8.395 4.833z" fill="#d946ef" /> </svg> </div> <div class="pt-1 pl-2 text-2xl font-bold tracking-tight filament-brand dark:text-white"> {{ config('app.name') }} </div> </div>Building the project
You may run the following commands in your terminal:
npm run build && php artisan serveOnce you have started the Artisan development server, your application will be accessible in your web browser at http://127.0.0.1:8000/admin. You can choose a user's credentials and authenticate to access the Filament Admin Panel (default password: password).
You can download this project on GitHub: leandrocfe/filament-custom-theme
🚀🚀🚀
Great! Thanks
Olá Leandro, blz? Tive que renomear a extenção do arquivo postcss.config.js para postcss.config.cjs. Da outra forma estava dando erro no layout. Depois disso o tema ficou ótimo para mim, Obrigado!